
A stain under a window or a crack that darkens after rain can make you wonder what is happening where you cannot see it. The hard part is that a dry-looking stucco surface does not prove the wall behind it is dry.
If you are trying to learn how to test stucco for moisture, start with one rule: you need more than one suspicious reading before you assume the wall has failed. Good stucco moisture testing looks for a pattern, not a single number.
Table of Contents
ToggleHidden Moisture Can Build Before You See the Damage
Hidden moisture can sit behind the stucco long before obvious damage shows outside. You may first notice stains, a recurring crack, loose trim, or a musty smell near an exterior wall.
The real concern is water intrusion that gets past the drainage layer and reaches exterior wall sheathing, framing, or vulnerable interior finishes. Repeated wetting can eventually lead to soft wood, mold growth, or more serious structural damage.
A stain below a second-story window, for example, may come from failed sealant around the frame, improper flashing, or a crack several feet higher.
For recurring cracks or prior repairs, review stucco patching and waterproofing before another surface-only fix is planned.
Signs That Justify Testing Instead of Waiting
You should consider a closer inspection when the same symptoms return after rain. A careful visual inspection can narrow the search before any meter or probe touches the wall.
Watch for:
cracks around windows or doors
bubbling paint or coatings
failed sealant joints
dark streaks or stains
soft trim
musty odors near interior walls
old patches that keep cracking
One symptom does not prove concealed damage. Several clues appearing in the same area make deeper testing much more useful.
How Water Gets Behind a Stucco Wall
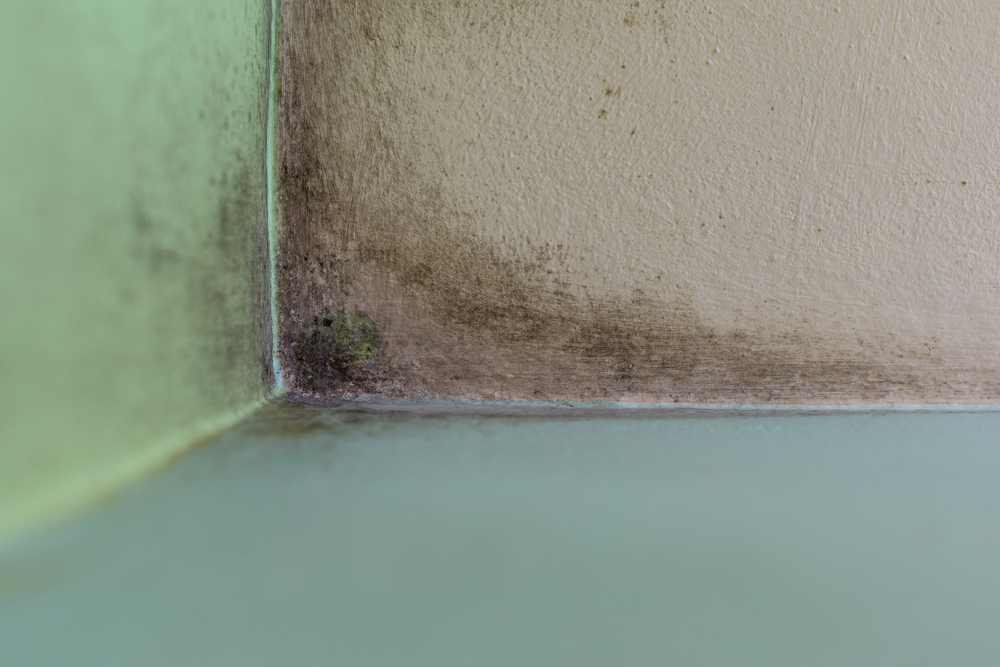
Water usually reaches the wall through a weak detail rather than through the middle of intact stucco. Common entry points include hairline cracks, window corners, roof-to-wall intersections, penetrations, failed joints, and poor flashing.
Orlando creates another layer of stress. Torrential summer rain can hit the same wall repeatedly, while high humidity can slow the drying process between storms.
Humidity alone does not create a leak. It can, however, leave already-wet materials with less time to dry before the next round of rain arrives.
The Wet Spot May Be Lower Than the Leak
Water can travel before it becomes visible. You may find a suspicious reading beneath a window even though the actual water entry begins along the upper frame or another nearby penetration.
If you patch only the stained spot, the wall may look better while the same leak continues inside the cavity.
Traditional Stucco and EIFS Need Different Assumptions
You should not treat every stucco-looking wall the same. Traditional cement plaster and EIFS use different layers, drainage details, and materials.
Those differences affect where moisture probes need to reach and how you interpret a reading. Review the EIFS system guide if you need a clearer picture of how that type of wall is assembled.
How to Test Stucco for Moisture
The safest way to answer how to test stucco for moisture is to use a sequence: inspect first, screen second, confirm third, then map the affected area. One reading should never make the whole repair decision for you.
Step 1: Start With a Visual and Physical Check
Start where leaks usually begin. Check window and door perimeters, cracks, roof intersections, wall penetrations, previous repairs, and other critical areas.
Good test locations are chosen for a reason. Randomly checking twenty places rarely tells you as much as comparing one suspicious area with nearby reference points that appear dry.
Pay attention to timing too. A mark that returns after every hard rain carries more diagnostic value than a stain that has not changed in years.
Step 2: Use a Pinless Meter as a Screening Tool
A handheld moisture meter can help you locate abnormal areas, but it does not automatically tell you what is happening inside the wall. Metal lath, fasteners, and other hidden materials can affect the signal.
For that reason, non-invasive screening works best as a comparison tool. You are looking for unusual patterns rather than chasing whichever spot gives the highest number.
If you are learning how to test stucco for moisture with a meter, compare similar sections of wall. Note zones that repeatedly show higher readings, then check whether those zones also line up with staining, cracks, or likely leak paths.
Some inspectors use equipment such as a Delmhorst moisture meter. Regardless of brand, the important question is what material the tool is actually measuring and whether the setup can produce accurate moisture readings.
Step 3: Use Thermal Imaging to Locate Patterns
Thermal imaging can help identify areas behaving differently from the surrounding wall. Infrared cameras detect temperature differences. They do not directly see water.
A cooler or warmer patch may point toward a concern, but shade, missing insulation, framing, HVAC effects, or recent rain can create similar patterns.
That makes infrared scanning useful for narrowing the search. It should not be treated as proof of hidden moisture content by itself.
Step 4: Confirm Concealed Moisture When Needed
If screening points toward a real concern, probe testing may be needed to learn what is happening in the substrate. Depending on the wall system, the process can involve drilling holes that allow a probe to reach material behind the finish.
Professional exterior probe testing is not simply a matter of making small holes. The probe needs to reach the correct layer without contacting metal that can distort the reading.
You should not drill blindly into a wall just to learn how to test stucco for moisture. Wiring, flashing, weather barriers, and plumbing can sit inside the assembly, and a poorly placed opening can create a new problem.
Where Orlando Homes Should Be Checked First After Summer Rain
Orlando homes deserve extra attention to details exposed to repeated storm cycles. Heavy summer rain, strong UV, humidity, and wind-driven weather can wear down joints, coatings, and sealants.
Start around windows, doors, roof-to-wall transitions, penetrations, old patches, and areas exposed to irrigation. Those are common places where small defects turn into recurring moisture intrusion.
Salt exposure is not as severe in inland Orlando as it is directly along the coast, but Central Florida materials still deal with intense UV, airborne contaminants, humidity, and long wet-dry cycles. Those conditions can age exterior sealants faster than many homeowners expect.
After a storm, the outside of the wall may still be damp while the inside remains healthy. The opposite can happen too: the stucco surface may look dry while sheathing inside stays wet.
Your best clue is a repeated pattern tied to location and weather.
What Moisture Reading Is Too High Behind Stucco?
A single percentage should not make your repair decision. Different meters, materials, scales, and testing modes can produce different moisture readings.
If you are trying to measure moisture levels in wood sheathing, the tool needs to be reading that wood correctly. Relative readings do not always equal true percentage moisture content, and nearby metal can produce misleading results.
The stronger question is whether the suspicious area stays higher than comparable dry areas, lines up with a possible leak route, and shows other signs of distress.
If you want to understand how to test stucco for moisture accurately, focus on location, substrate, repeatability, and context before you focus on one percentage.
One High Reading Should Trigger Investigation, Not Demolition
One odd result should lead to more checking, not an automatic tear-out estimate. Re-test nearby locations, confirm what material is being measured, and look for a logical path for the water.
You want several pieces of evidence pointing toward the same conclusion.
Moisture Found Does Not Always Mean Major Damage
Finding moisture is not the same as finding failure. You may catch a recent leak before the sheathing has lost strength.
The repair decision depends on how long the area has stayed wet, how far the condition spreads, what material is affected, and whether the source can be corrected.
Early detection gives you a better chance of keeping the work targeted. It can also aid you avoid expensive repairs based on damage that was allowed to spread unnoticed.
How to Investigate Stucco Moisture in an Orlando Home Without Guessing
A practical investigation follows a simple order: document, screen, confirm, map, then repair the cause. You want enough evidence to support the work before anyone starts removing good material.
Step 1: Document What Changes After Rain
Photograph cracks, stains, failed joints, and visible interior symptoms. Note whether they appear during the storm, several hours later, or only after a string of wet days.
If irrigation hits the same wall, record that separately. Sprinkler exposure can create a different pattern from rain-driven water penetration.
Step 2: Trace the Entry Point Before Planning a Patch
Follow the likely route upward and outward. Check sealant, flashing, penetrations, window details, and nearby transitions before blaming the visible crack alone.
Skipping this step can leave you paying for a clean patch while the same hidden leak continues feeding the wall.
Step 3: Map the Affected Area Before You Approve Repairs
One test point tells you what is happening at one location. Checks at strategic locations around it can show whether the problem is isolated or extends farther along the wall.
That mapping matters because repair scope cuts both ways. Too little removal can leave damaged material behind. Too much can turn a localized problem into an unnecessarily expensive project.
If you are still unsure how to test stucco for moisture after screening and mapping, a qualified inspector can help separate a suspicious reading from a confirmed wall problem.
What to Do After Moisture Is Confirmed Behind the Stucco
Your next move should depend on the cause and condition of the wall. Stop the leak before restoring the appearance.
If the substrate is sound, a localized correction may be enough. If sheathing is soft or deteriorated, more of the assembly may need to be opened so affected material can be removed and the source corrected.
A wider pattern may justify additional moisture testing before the final scope is set. EIFS may also need different repair logic from traditional stucco walls.
For confirmed repair needs, review stucco repair in Orlando before approving a surface-only fix.
Repair the Water Path Before the Appearance
The order matters: correct the entry point, deal with damaged material, rebuild the wall assembly, then restore the finish.
Perfect matching color means very little if the leak is still active. A polished patch over an unresolved leak can hide the problem long enough for the next storm cycle to start the damage again.
Once the source is corrected, stucco patching and waterproofing becomes part of the restoration rather than a cover-up.
When Stucco Moisture Testing Should Become a Professional Inspection
Professional help makes sense when symptoms keep returning, several areas test suspiciously, or concealed material needs confirmation. You also need more expertise when the likely leak path is not obvious.
A useful moisture inspection should tell you what was tested, which method produced the reading, what material was reached, where the likely entry point sits, and how far the affected area appears to extend.
You should be cautious about broad demolition based on one unexplained meter reading. A surface-only patch without a clear explanation of the leak source deserves the same caution.
Orlando Stucco Repair Pros gives you a local path from diagnosis to a repair plan built around the evidence found in your wall. For direct help, you can schedule a stucco consultation in Orlando.
Your goal is simple: find what is wet, identify where the water entered, and approve only the amount of repair the evidence supports. That protects your home without paying for guesswork.
Frequently Asked Questions
How much does a stucco inspection cost?
The cost of a stucco inspection depends on how much testing is needed. A basic visual review usually costs less than an inspection that includes thermal imaging, moisture testing, or probe testing at several locations.
The size of your home, the number of suspected problem areas, and whether the inspector needs to access hidden wall materials can all affect the final price. Before hiring anyone, ask what the inspection includes and whether the fee covers a written report, moisture mapping, or repair recommendations.
What happens if water gets behind stucco?
Water behind stucco can soak the wall materials that are supposed to stay dry. If the problem keeps happening, exterior wall sheathing, framing, insulation, and interior finishes may begin to deteriorate.
The bigger risk is repeated water intrusion that goes unnoticed. Over time, wet materials can soften, rot, or create conditions for mold growth. The right repair starts by finding the entry point, measuring how far the moisture has spread, and fixing the source before restoring the stucco surface.
Does homeowners insurance cover stucco issues?
Homeowners insurance may cover some stucco-related damage, but coverage usually depends on what caused the problem. Sudden damage from a covered event may be treated differently from long-term leaks, poor maintenance, construction defects, or gradual deterioration.
Your policy language and the insurer’s investigation will determine what is covered. If you find water damage behind stucco, document the condition with photos and inspection findings, then review the policy before authorizing major repairs.
Can mold grow behind stucco?
Yes, mold can grow behind stucco if moisture reaches materials that can support growth and stays there long enough. The stucco itself is not usually the main food source, but wood sheathing, paper-faced products, dust, and other organic materials inside the wall can become vulnerable when they remain damp.
A musty smell, recurring stains, or persistent moisture issues can justify a closer inspection. The priority is to stop the water entry, dry the affected area properly, and address any damaged materials instead of simply covering the exterior stain.
Can a moisture meter detect water behind stucco?
A moisture meter can help identify suspicious areas, but it does not always confirm water behind stucco on its own. Metal lath, fasteners, wall thickness, and the type of meter can all affect the reading.
Pinless meters are often more useful for screening and comparison. If an area keeps showing elevated moisture readings, additional testing may be needed to confirm what is happening in the sheathing or other materials behind the wall.
What moisture level is considered too high behind stucco?
There is no single moisture percentage that applies to every stucco wall. The meaning of a reading depends on the material being tested, the meter being used, and whether the number represents actual moisture content or a relative reading.
A better approach is to compare the suspicious area with nearby dry locations and look for a consistent pattern. If readings stay elevated and line up with stains, cracks, or a likely leak path, you have a stronger reason to investigate further.

